Showing posts with label recipes. Show all posts

Friday, 13 January 2017

Rambling Mummy Loves....Slow Cookers

In this fast paced world time has unfortunately become one of our most precious luxuries. Whether it's, family life, work, education etc we seem to be trying to cram so much in to our waking day that we merely exist instead of actually living. As a mum of 4 time is extremely valuable so anything that can free up some of it has to be a bonus right??
After months of people raving about slow cookers, I finally bit the bullet and bought one and do you know what I haven't looked back once. So this weeks rambling mummy loves is all about one of the smallest and most cost efficient kitchen appliances...the slow cooker.

Slow cookers are a convenient and easy way to make a meal. Some boast 'amazing' features such as a bowl that can be used on the hob. Expensive models often have digital controls, more timer options and even have an auto stir function but like anything, all you need is something that does the job you need it to.


Swan SF17020N 3.5Litre Slow Cooker
http://amzn.to/2jeNO0d
£32.46
I have had many a tasty meal straight from my mums slow cooker before. Whether she is cooking for just her and my dad or is preparing for a visit from me and my brood her slow cooker always has the capacity to cope. With its easy to clean bowl, simple timer and pretty cleanline design, you'd have no issues with this sitting atop your work surface. 

http://bit.ly/2irOs9n
£14.99
Before rushing out to buy a pricey slow cooker I thought it best to start simple and get a basic one which meant if I didn't get on with it I hadn't broken the back. I did some quick research and reserved myself this little bad boy from Argos.
Value for money and basic, I thought even this slow cooker virgin could handle this one.
Whilst it's not the biggest of slow cookers, it was able to cook most meals for my family of six with its simple hi and lo and fab keep warm features. Although a great product, I'm not sure of this would have stood the time of daily usage for 6 in our household but nonetheless a great product for a great price.


http://bit.ly/1EX7gRe
£40
Once we realised that this would actually be a good investment we did(and by we I mean me because let's face it, nobody else in this house cooks!) a bit more research and finally settled on this as the new addition to our family. At 6.5 litres capacity we certainly don't struggle to fit meals into it. The toughened glass lid is great for checking on our food without having to remove it and the removable ceramic bowl is great to use as a serving dish. There are 3 heat settings which are easy to choose from using the dial. At the moment I've only had chance to use this for functional family meals, however, I have a huge list of fun recipes compiled that I can't wait to try out.

If you have a slow cooker or plan on buying one, let me know how you get on with it.

M xx

Sunday, 10 November 2013

Weekly Meal Planner

When I originally set out to do these weekly meal planners I thought it would be an easy task, the last couple of months have actually shown me how repetitive some of our meals have begun and it's not actually as easy as you'd think planning a weeks worth of meals would be.
All of these factors have really made us think about what meals we could do with a break from and what meals we could do with re-introducing into our lives.

Weekly Meal Planner

Monday
Turkey curry with noodles

Tuesday
Lasagne and salad

Wednesday
Meatballs and cous cous

Thursday
Mushroom, bacon and onion potatoes

Friday
Homemade fish cakes and linguine

Saturday
Homemade pizzas

Sunday
Grilled chicken, potatoes and salad

Are there any meals that make a regular appearance at dinner time? What new recipes have you tried lately? I'd love to hear about some of your favourite recipes.

M xx

Thursday, 8 August 2013

What a difference a week can make!

Aaaaaah, after a well needed week away I feel ready to take on the world!
Life felt like it was running away with me so counting down the weeks until we went away was keeping me sane. 
The day before we left was as hectic as hectic could be. We had the cleaners in, had to finish packing 5 cases, went to the salon for a manicure and pedicure and had to wash,blow dry and braid up my daughters hair amongst other things.

Even after arriving at our hotel in Turkey at 5am I felt like a weight had been lifted and that for a whole week all of the 'normal' stresses of life could be forgotten.

4 excursions, many visits to the mini golf by our hotel, shopping and gorgeous meals out, busy, but most definitely needed!
Now, 4 days after arriving home I feel refreshed, full of vitality and ready to really start living life again. 
It really is amazing what just a weeks break can do.

Soooooo, with all of this energy I have look out for some fab new recipes, DIY projects, school holiday activities and arts and craft tutorials coming soon on my blog!!

                                M xx

Monday, 17 June 2013

A Fanciful Idea!

I have always found baking to be therapeutic and satisfying and finding new recipes or trying out new ideas has always pleased the entire family.

I have recently been trying to catalogue and organise all of my cooking and baking books when I stumbled across a recipe for French Fancies. As much as I love a French Fancy the thought of actually attempting to make them filled me with terror. I had a look at a few different online tutorials and written recipes and mustered up the courage to have a go.

Whilst the finished product isn't exactly a French Fancy that the infamous Mr Kipling would be trying to pass off as his own, they were totally scrumptious.

Below is my own tweaked recipe for our take on the classic  French Fancy - 'The Not So French Fancy!'

You will need:
For the sponge - 20cm square baking tin
                           Grease proof paper
                           Self raising flour
                           Caster sugar
                           Unsalted butter
                           4 eggs

For the butter cream - Unsalted butter (softened)
                                    Icing sugar

For the icing - Apricot jam
                      Marzipan
                      Royal icing
                      Water
                      Food colouring

First things first, grease and line your baking tin then make the sponge. Cream the butter and sugar together until light and fluffy then beat in  the eggs one at a time.


To keep your sponge nice and fluffy,using a metal spoon, gently fold in the flour a little at a time. Doing it this way will ensure you keep as much air in the mixture as possible.


Once all ingredients are combined pour the mixture into the baking tin and bake in the middle of the oven at gas mark// for about 40 mins or until soft but firm to the touch.


Once cooked, remove from the oven and allow to cool on a wire rack. Once completely cooled put in the fridge to chill for 20 mins.


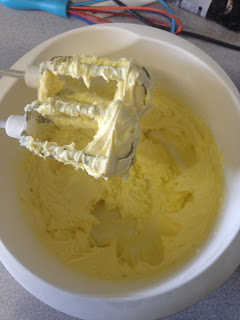
While the cake is cooling, make up the buttercream. Cream the icing sugar and softened butter together until light and fluffy then put about 1/4 of the buttercream into a piping bag and leave the rest in the bowl.


Roll out the marzipan so that it is the same size as the cake. *TOP TIP* use the base of your baking tin as a template to cut the marzipan to the right size. Melt the apricot jam so it can be brushed easily. 


Remove the cake from the fridge and cut the top horizontally so that it is level when turned over.

Brush the top of the cake with the melted apricot jam and then carefully lay the marzipan on the top trimming any excess.


Using a ruler and knife measure and gently mark out 25 4x4cm squares. Once happy with your squares cut the cake using your guide.


Using the buttercream in the bowl, cover the 4 sides of the cubes leaving the top and bottom plain. Once you have covered all of the cubes use the buttercream in the piping bag to pipe a dollop on the top of each of the cubes(on the marzipan).


Put the cubes into the fridge to chill for a further 20 minutes. While the cubes are in the fridge make the icing.

Cut the royal icing into cubes and place in a blender or mixing bowl. Add a little water and start to mix or blend. Put a couple of drops of your chosen food colouring into the bowl and continue to mix. keep adding the water and mixing until you have a fluid but thick consistency. once happy with the icing mix remove the cubes from the fridge.


Pick up the cubes, one at a time by pricking them with a fork at the base and dip them into the icing mix. Coat all of the cubes and then put them back on the wire rack and back in the fridge to set.

Once the icing has set you can either melt some chocolate and drizzle over the top of each cube or make up some white or coloured icing sugar and drizzle that over the top(that wasn't possible in our house because as soon as the icing had begun to set they were devoured!!!)


Yes this is quite a lengthy process but definitely worth it :-)

M xx

Monday, 3 June 2013

'HI'

Hi all

I'm Emma, mum to 3 beautiful (and energetic) children.  For years now I have had a love for all things 'crafty' from making jewellery to soft furnishings;cupcakes to wedding crafts and for years I have said I will put all of these projects together in a book, blog, album etc but it just never happened.
Soooooo, I've decided to stop putting it off and get my act together.

Along with projects and recipes I'm sure you'll also find quite a few posts of my ramblings on life, love and children; helping you gain an insight into the crazy world that is....my life!